Structure Panel and Layers
Using the Structure Panel to Organise your Analysis
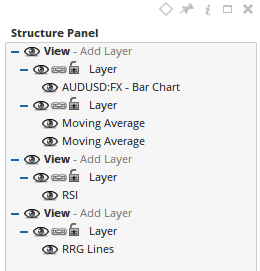
The Structure Panel’s primary purpose is to help you arrange analysis under different layers, giving you greater control when hiding / displaying a set of tools. The Structure Panel will display in tree form.
It has the main controller at the top, then specific layers, followed by the contents of each layer (tools, charts, etc).
Everything that is displayed on the chart will be available to select on the Structure Panel.
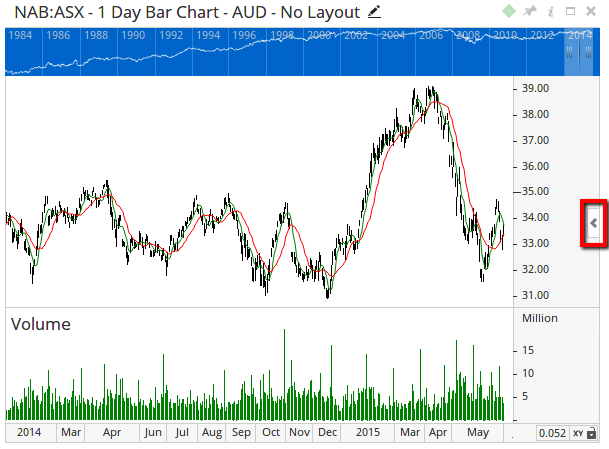
The Structure Panel is not displayed automatically when a chart is opened. To open the Structure Panel, go to the centre-right side of the chart window, and click the Expand icon.
What are Layers?
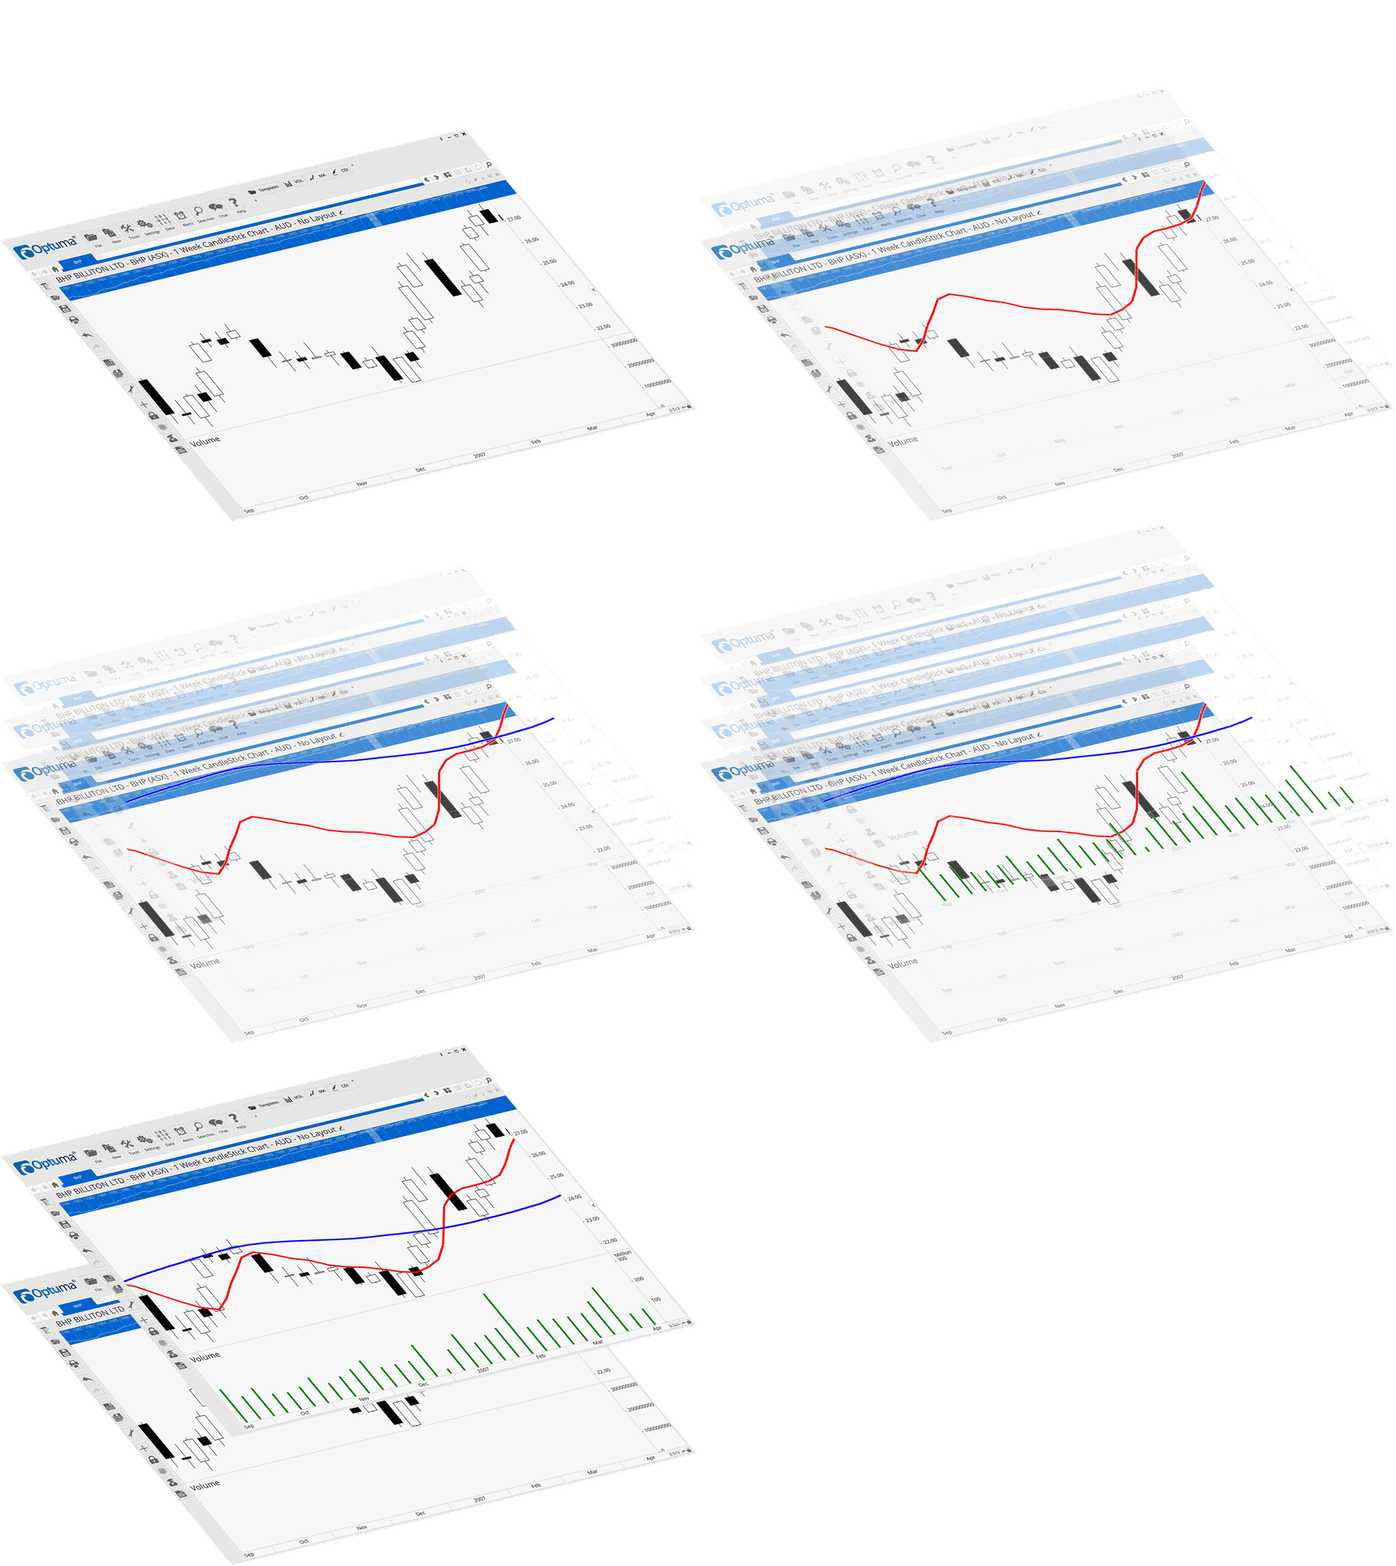
Imagine a sheet of white paper with a chart on it.
If you add over the top of this sheet of paper a piece of clear plastic film, you have a layer.
You could add a number of tools to this plastic film which, although they appear to be on the chart, they are in fact on the plastic film which is a different layer.
From here you could then add another piece of clear plastic film over the first sheet of plastic film and add further tools or charts. Every sheet of plastic film added is another layer.
Hiding a Layer
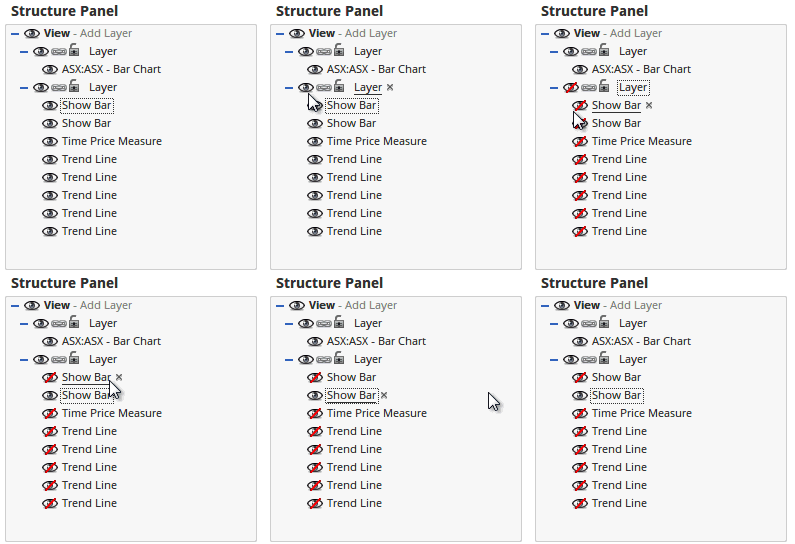
To hide a layer from view, go to the Structure Panel, locate the layer you wish to hide, and left-click on the Visible / Hide icon.
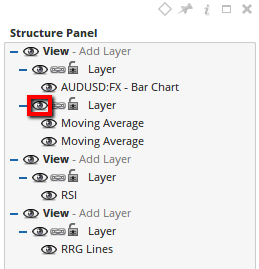
The contents located within the layer will be hidden from the chart.
From Optuma v1.5 versions and later you can now hide a layer containing multiple items then unhide a single item within that layer (previously you had to keep the parent layer in view and hide the other individual items one at a time).
Locking a Layer
You can lock a layer so that the items within the layer can’t be modified.
To do this, left-click once on the layer you want to lock.
Displayed in the Control Panel on the left-hand side will be a number of Properties.
Locate the option called Layer Locked and tick it.
To unlock the layer again, simply untick the Layer Locked checkbox.
Linking Layers
Linking is how we tell a layer if we want it to be linked to the chart layer’s price range or whether it should use it’s own price range. Optuma is usually smart enough to make the decision when the tool is added. ie. If the tool is in the same range as the chart layer, it will link to that and make sure that both the chart layer and the linked tool layer are visible on the chart. If the value is very different, Optuma will unlink the layer and make sure that both are scaled so that they fully use the area on the chart.
When layers are unintentionally unlinked, it can appear that indicators are in the wrong place, or they move about. For more information on this, click here.
Layer Properties
To access Layer properties, go to the Structure Panel, left-click on the Layer, and the properties of that layer will display in the Control Panel on the left-hand side.
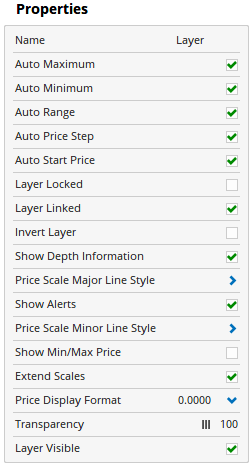
Layer Name: Allows you to customise the layer’s name. This is useful when you are wanting to group items (such as tools) together under one layer.
Auto Maximum: When enabled, Optuma will automatically adjust the highest price the scale displays to as you scroll through the chart.
Auto Minimum: When enabled, Optuma will automatically adjust the lowest price the scale displays to as you scroll through the chart.
Auto Range: When enabled, Optuma will automatically set the price range covered by the scale so that all data on the page is within view.
Auto Price Step: Automates the price steps and scale for the grid (when enabled).
Auto Start Price: By default, all price scales start at zero. Unticking the Auto Start Price option gives you the option of adjusting the starting value of your price scale. This in effect works as a type of vertical offset for your charts data.
Layer Locked: Locking a Layer prevents any additional items from being added to that layer (tools, etc.).
Layer Linked: When two or more Layers are displayed under one view, you can set whether the layers are linked (items such as price scales are shared across the layers), or whether the layers are separate (used when merging two windowed tools together into one).
Invert Layer: When selected any tools/indicators that are in the layer will be inverted on the chart.
Show Depth Information: If your chart is sourced from a real-time data vendor, you can opt to display Market Depth values in your price scale. Unticking this option will hide the depth information from view.
Price Scale Major Line Style: Only applicable to the chart layer and when grid lines are enabled. Allows adjustment of the Price Scale Major line style, width, colour and transparency.
Show Alerts: When selected any active Price Alerts will be highlighted in the Price Scale.
Price Scale Minor Line Style: Only applicable to the chart layer and when grid lines are enabled. Allows adjustment of the Price Scale Minor line style, width, colour and transparency.
Show Min/Max Price: When selected, for the bars that are in view the highest high and lowest low values will be displayed in the Price Scale.
Extend Scales: Enabled by default the Price Scale will extend to the full height of the chart. If deselected the Price Scale will only display a scale range applicable to the bars that are in view. For example, if the chart is compressed vertically then the Price Scale will also be reduced.
Logarithmic Scale: From version 1.5 and later you can now control the scale being used on a per layer basis. This allows you to overlay two different codes and display only one of them in a Log scale.
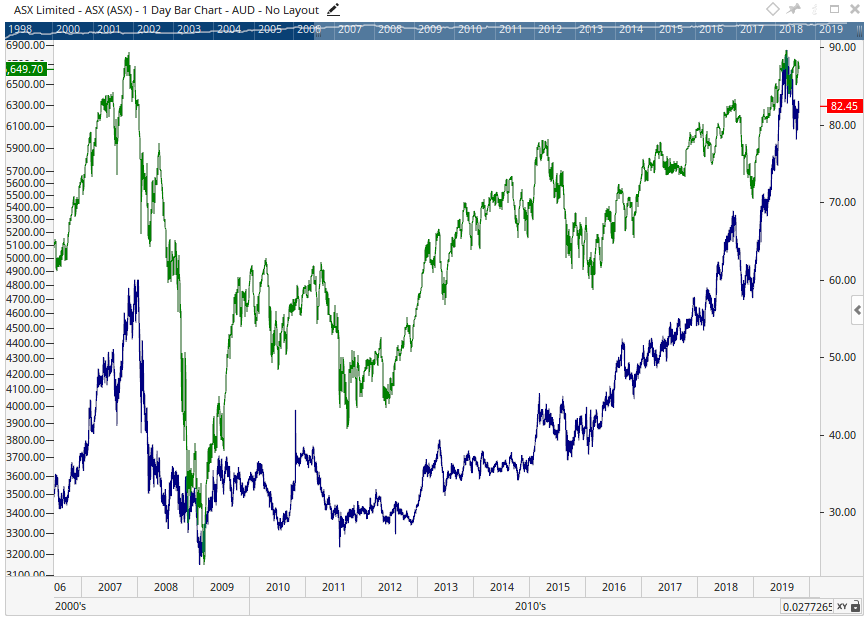
XJO overlaid on top of the code ASX. XJO scale (left) is set to Log where as the ASX (right) scale is set to standard.
Price Display Format: Displays the number of decimal places displayed in the Price Scale. You can adjust this value if you wish to increase/decrease the decimal settings used on a particular chart.
Transparency: Use this slider bar to adjust the transparency of the items contained within the selected layer.
Layer Visible: You can hide the items contained within the selected layer by unticking this option. This will prevent those items from displaying on the chart itself.
Video
This video is pulled from the Optuma 101 course that you can access here. This course takes you through the basics of Optuma and helps you get up and running and using Optuma to its full potential. This video will cover how to use the Structure Panel and Layers in Optuma.