Optuma Installation
Download the desktop software, check your system, and follow the step-by-step setup guide.
Thank you for your interest in Optuma. This page will take you through the process of:
- Testing your system to ensure it meets our minimum requirements
- Installing Optuma
If you have any questions you would like to ask before installing Optuma, please submit a support ticket and we'll get back to you.
System Requirements
Before downloading the Optuma Setup file, please ensure that your computer meets the system requirements.
Optuma may install and run on systems with specifications lower than those mentioned; however, we cannot guarantee the speed or stability of all program functions. Support for systems not meeting the minimum system requirements may be limited.
- CPU
- Intel i5 2.8 GHz or AMD equivalent.
- Memory (RAM)
- 4GB — more allows for bigger portfolios to be monitored.
- Hard Drive Space
- 50MB — 10GB (depending on exchange data used).
- Windows Operating System
- Windows 8 / 10 / 11 (64-bit). Optuma can run on Windows 11 ARM-based systems (such as the latest MS Surface Pro); to ensure optimal performance, install Optuma v2.3 or later. Older versions may cause issues such as random graphics flickering.
- Video Card
- Nvidia GeForce (Series 8xxx or higher) or ATi Radeon HD (Series 5xxx or higher). Minimum of 1GB of dedicated video memory.
- Monitor
- LCD/CRT capable of displaying at 1280 x 1024 (widescreen LCD monitors are highly recommended).
- Internet Connection
- Fixed line or wireless broadband.
macOS user? Optuma is Windows software. Many Mac users run it inside a Windows virtual machine such as Parallels Desktop.
Optuma System Requirements Test
If you are unsure of your system's current specifications, you can perform an automated check by downloading and running the Optuma Requirements Test program.
When using the System Requirements Test, the following information will be collected about your hardware configuration:
- Operating System Version
- Central Processing Unit (CPU) Type
- Total Random Access Memory (RAM)
- Video Card Mode
- Total Video Memory
- Current Screen Resolution
- OpenGL Version
- OpenGL Extensions Capabilities
To get more information about why a particular test may have failed or scored marginally, simply click the Help button at the end of the test.
Installation Steps
Step 1
First, log in with the button below to get access to your download link. Once you have downloaded the Optuma Setup file, you can begin the installation.
Click the download button below and save the Setup.exe file. Once downloaded (usually to the Downloads folder on your computer), double-click the file to begin the installation.
Step 2
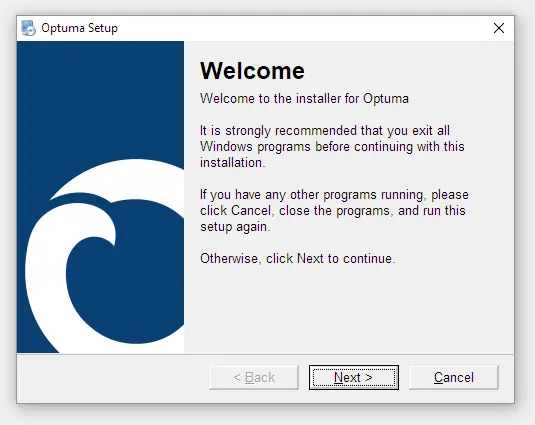
In the window that opens, left click on the Next button.
Step 3
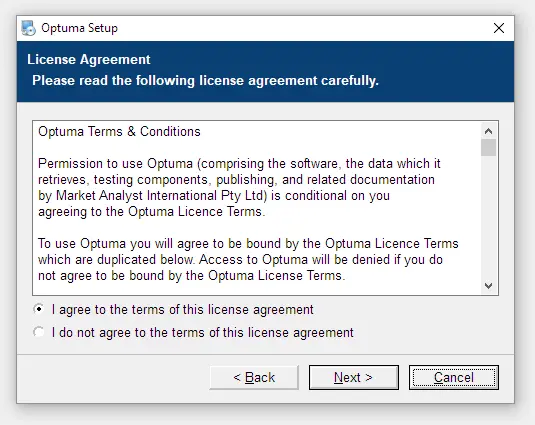
Read, and agree to the Terms & Conditions and click the Next button.
Step 4
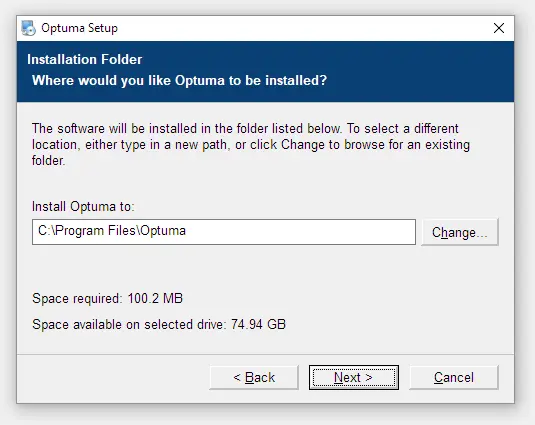
We recommend that Optuma be installed in the default Program Files location, so click Next. You can install in another location by clicking the Change button.
Step 5
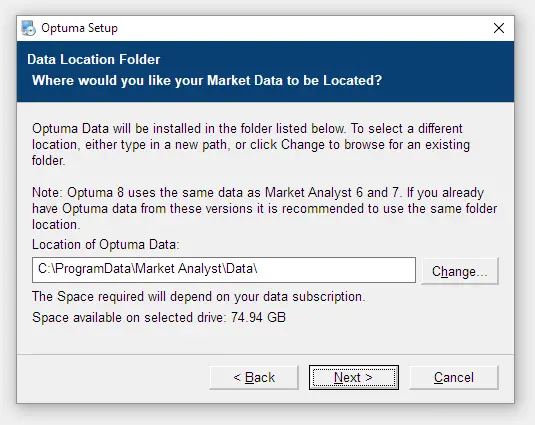
To save the data to the default location (recommended) click Next. To save elsewhere click the Change button.
Note: If you have Market Analyst 7/8 already installed on your system, Optuma will use the same data set by default and the installer will skip over this step.
Step 6
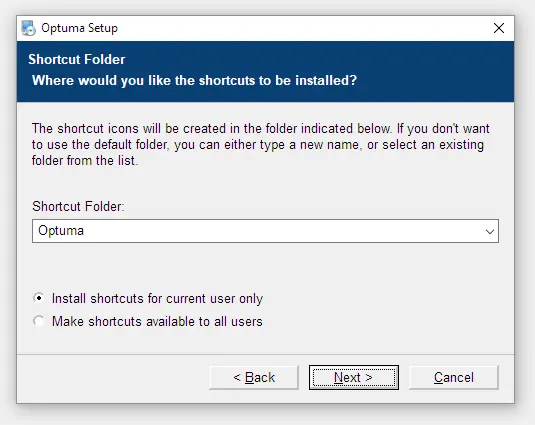
Select a Shortcut folder and choose whether Optuma will be available to all accounts on this computer, or the current account only. Click the Next button to continue.
Step 7
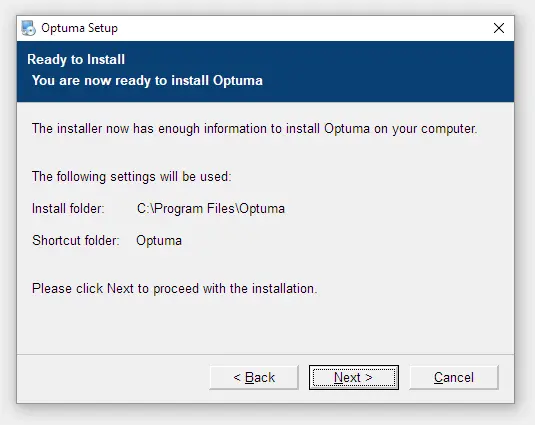
Confirm the final details, and click the Next button to begin the installation process.
Step 8
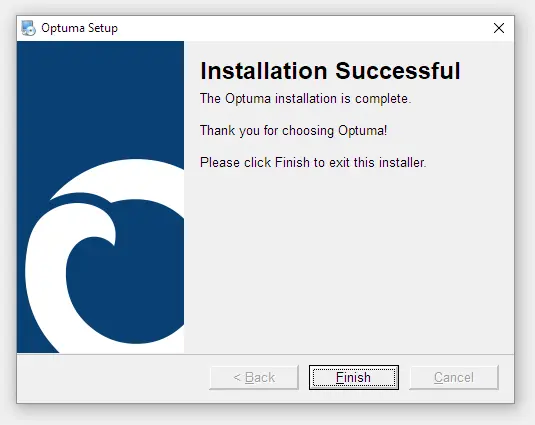
The files required to run Optuma will begin installing on your computer. Once the installation process has completed, click the Finish button, and you will be taken back to your Desktop.
Completed
You can now open Optuma via the new shortcut available on your Desktop.
Forgot your login details?
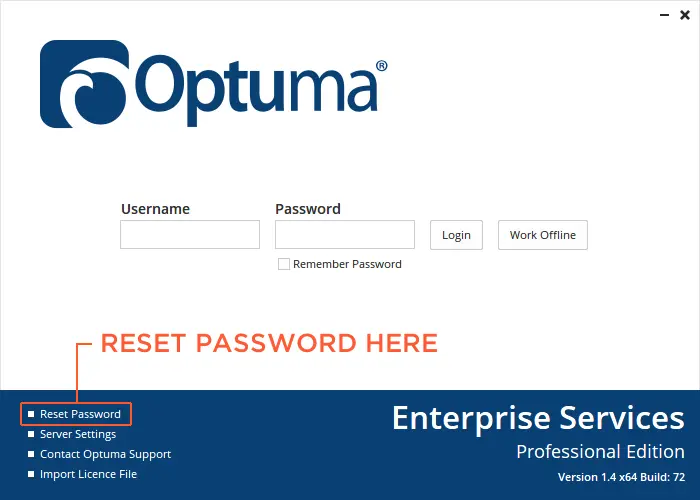
To log in to Optuma, simply enter your Optuma username and password. If you have lost or forgotten your details, you can request a new password at the Optuma splash screen.
Getting Started
Now that you have installed Optuma, watch the Introduction Video Series to get up and running.
Introduction Video Series